MySql and PhpMyAdmin Installation on Linux
In Linux operating system there is already Apache server , which is the most commonly used Web server on Linux systems. Web servers are used to serve Web pages requested by client computers. Clients typically request and view Web pages using Web browser applications such as Firefox, Opera, Chromium, or Internet Explorer.
You may also install by, sudo apt install apache2 . for more follow this link

Step 1: Check your host name
$ hostname
Step 2: Update your System package index by following command
$ sudo apt-get update
$ sudo apt-get upgrade
Step 3: Installing the mysql-server
$ sudo apt-get install mysql-server
Note: During the installation process, you will be prompted to set a password for the MySQL root user . Choose a strong password and keep it in a safe place for future reference.
Step 4 (OPTIONAL): Run the mysql_secure_installation script to address several security concerns in a default MySQL installation
$ sudo mysql_secure_installation
Note 1: You may skip this step on your choice
Note 2: This command will prompt some question regarding you security concern. You may change the root password already set to root user. Recommended to give answer in yes. but It may depends on your requirement.
Step 5: Testing Mysql
$ sudo service mysql status
● mysql.service - MySQL Community Server
   Loaded: loaded (/lib/systemd/system/mysql.service; enabled; vendor preset: enabled)
   Active: active (running) since Sun 2018-06-17 13:12:45 IST; 32min ago
 Main PID: 14860 (mysqld)
    Tasks: 28 (limit: 4915)
   CGroup: /system.slice/mysql.service
           └─14860 /usr/sbin/mysqld
Note: you may use command to start, stop, restart and check status of mysql server as follows.
$ sudo service mysql start
$ sudo service mysql stop
$ sudo service mysql restart
$ sudo service mysql status
Step 6: Getting access to MySql via Terminal
mysql -u root -p
Enter password:
Welcome to the MySQL monitor.  Commands end with ; or \g.
Your MySQL connection id is 13
Server version: 5.7.22-0ubuntu0.17.10.1 (Ubuntu)
Copyright (c) 2000, 2018, Oracle and/or its affiliates. All rights reserved.
Oracle is a registered trademark of Oracle Corporation and/or its
affiliates. Other names may be trademarks of their respective
owners.
Type 'help;' or '\h' for help. Type '\c' to clear the current input statement.
mysql>
Conclusion: You have installed the MySql on your system.
Click here for uninstalling MySql Server
>>>>>PhpMyAdmin Setup On linux<<<<<
Prerequisites : Make Sure MySql Server is already installed
Step 1: Installing PhpMyAdmin
$ sudo apt install phpmyadmin
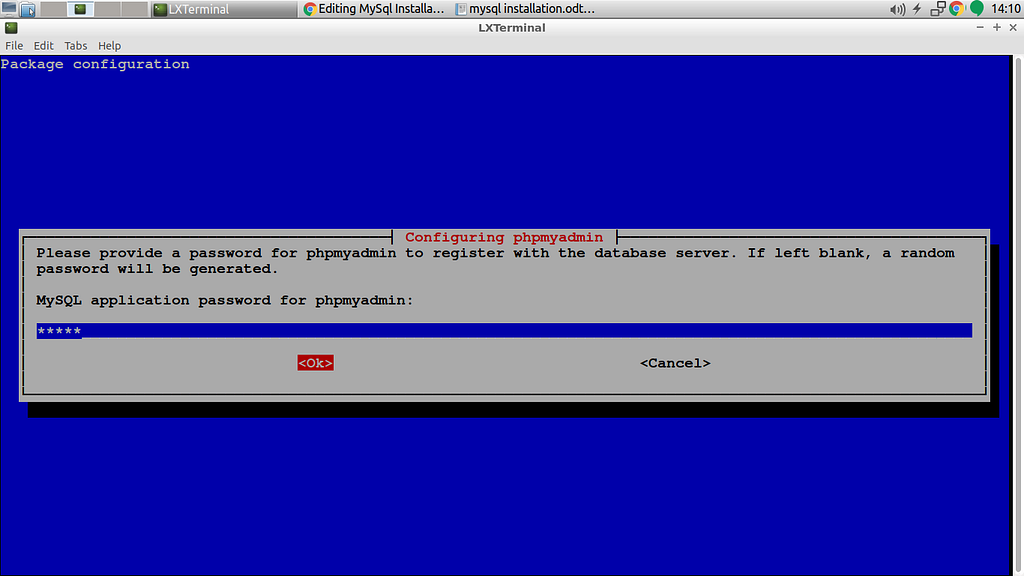
Note: You will asked to set the password of PhpMyAdmin


Step 2(Optional): Installing PHP (optional only when you run php code on apache2 )
$ sudo apt-get install php
Step 3: Setting a link between phpmyadmin and public html directory
$ sudo ln -s /usr/share/phpmyadmin /var/www/html/phpmyadmin
Step 4: Setting apache configuration file linking
$ sudo ln -s /etc/phpmyadmin/apache.conf /etc/apache2/conf-available/phpmyadmin.conf
$ sudo ln -s /etc/phpmyadmin/apache.conf /etc/apache2/conf.d/phpmyadmin.conf
Step 5: sudo service apache2 restart
Step 6: Then go to browser and type: —
http://localhost/phpmyadmin/
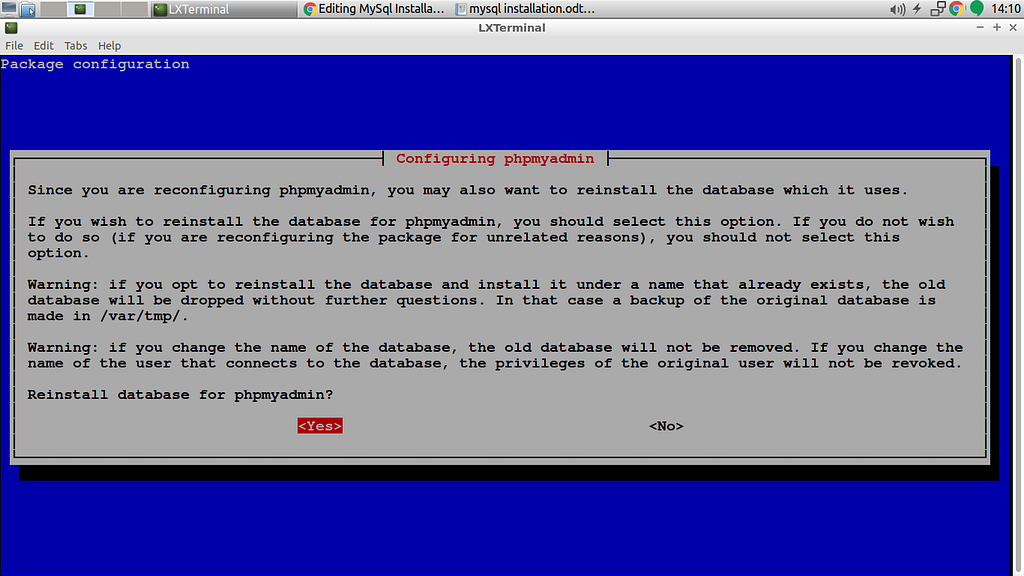
Note:- Re configuring phpmyadmin
$ sudo dpkg-reconfigure phpmyadmin
Note: Creating new user for mysql and assign all previllages if can’t access mysql.
$ sudo mysql : This will open mysql command prompt…
$ mysql> CREATE USER ‘newuser’@’localhost’ IDENTIFIED BY ‘user_password’;
$ mysql> GRANT ALL PRIVILEGES ON * . * TO ‘newuser’@’localhost’;
$ mysql> FLUSH PRIVILEGES;
Thank You.

